
Firebase Cloud Messaging
What CRM Capabilities does Aampe add to Firebase?
Aampe adds many advanced CRM capabilities to Firebase out of the box, including:
- AI-driven user segmentation
- Dynamic content
- User-level user journeys
- Omnichannel Orchestration
- AI-Reinforcement learning
- KPI/Reporting dashboard
- ...and much more.
Click here for more details.
Estimated setup time
1 hour
Requirements
- Your Firebase project ID
- Service account JSON credentials
Aampe will essentially call the Firebase Cloud Messaging API on your behalf.
Setting up Firebase Cloud Messages involves four steps:
- Enable the Cloud Messaging API
- Create a custom role for message creation
- Create a service account
- Generate a key
All the next steps assume that you start from your Google Cloud Platform console with your Firebase project selected.
Enable the Cloud Messaging API
- Type "Firebase Cloud Messaging API" in the Search products and resources textbox.
- Choose Firebase Cloud Messaging API from the list.

- Click on the blue Enable button.

Create a custom role for message creation
A custom Role must be created in the system to allow Aampe to trigger notifications using the API because the default roles do not provide granular enough permissions.
- Type "Roles" in the Search products and resources textbox and select the Roles (IAM and Admin) option. This will take you to the Roles page.

- Click on + CREATE ROLE
- Fill in the role Title, Description and ID according to your conventions.

- Click on +ADD PERMISSIONS
- In the window that opens, search for
cloudmessaging.messages.createusing the textbox to the right of the Filter and select the cloudmessaging.messages.create entry that appears.

- Tick the
cloudmessaging.messages.createpermission and click on ADD

- Once added, click on CREATE to complete the role creation.

Create a service account
- Type "Service accounts" in the Search products and resources textbox.
- Choose Service accounts (IAM and admin) from the list. This will take you to the service account page.

- Click on + CREATE SERVICE ACCOUNT

- Fill in the Service account name, ID and description according to your conventions.

- Click on CREATE AND CONTINUE
- On the Grant this service account access to the project screen, click on the Select a role dropdown.
- Under Quick access > Custom, select the custom role you created in the previous step.

- Click on + ADD ANOTHER ROLE and then on the Select a role dropdown.
- Type "Firebase Cloud Messaging Admin" in the box near the Filter.
- Select the suggested Firebase Cloud Messaging Admin role.

- Click on DONE to complete the service account creation.

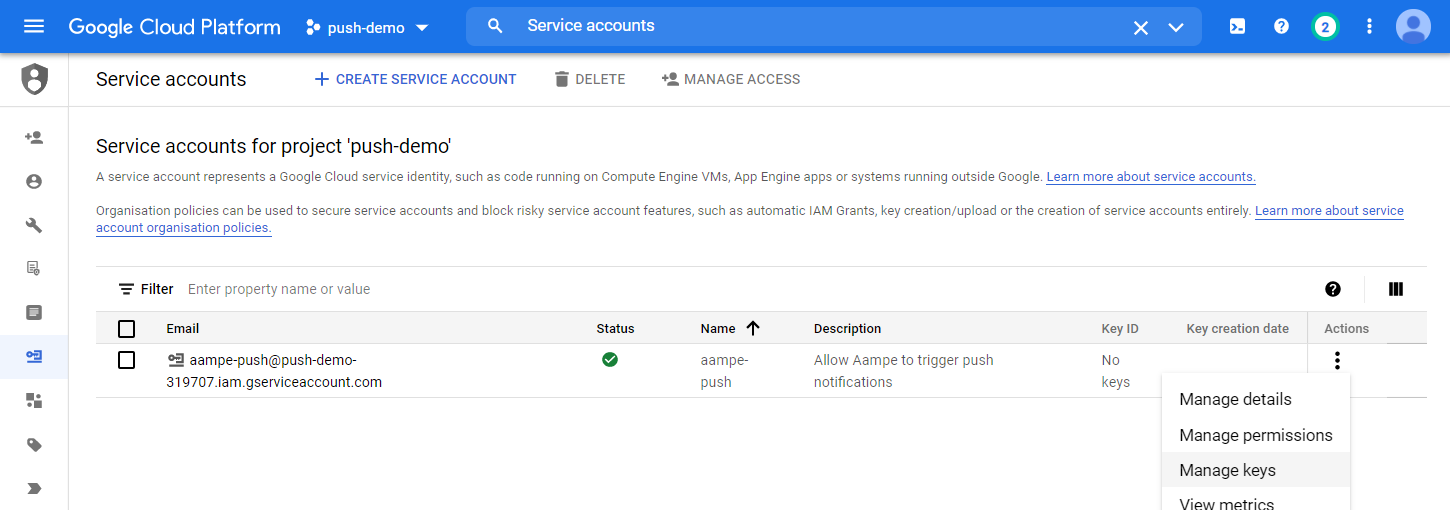
This step assumes that you created a service account and assigned the "Firebase Cloud Messaging Admin" and custom message creation roles to it.
Generate a key
- In your "Service accounts" page, find the service account you created for Aampe and click on the three dots in the Actions column and select Manage keys
- Click on ADD KEY and select Create new key

- Select the JSON Key type and click on CREATE

- Your browser will download a
.jsonfile with the key needed by Aampe.
You are done! All you need to do now is securely share your Project ID and JSON file with Aampe.
Updated 4 months ago